
Reference video guide
How to animate a character image using a reference video
Use a character image with a video showing the performance you want to follow. In the Vismuse workflow linked here, upload your character image and choose a provided reference clip. Below is a real test with both inputs and its generated result.
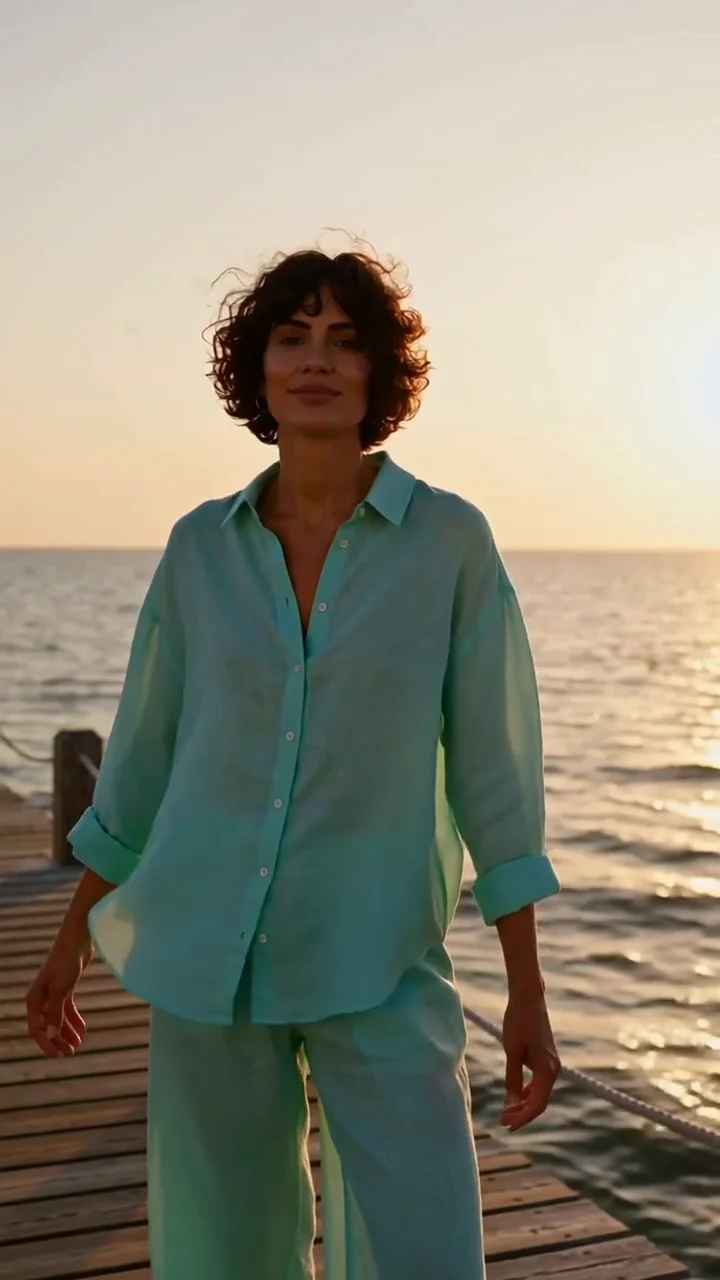
Example: one character image, one reference video, one generated performance
These are the actual paired inputs and output from a recorded Vismuse reference-guided generation test. The image supplies the fictional character's face, hair, and turquoise clothing. The five-second video supplies the party scene, lead performance, and camera movement. The result places the reference character in the party rather than carrying over the seaside background.
Compare the character's appearance, the hand gestures, the cup, and the room across the reference and result. This example illustrates a short performance recreation; it does not establish exact frame-by-frame motion transfer, perfect likeness, lip-sync, or reproduction of the original song. The source clip's original audio was removed; the test requested a new instrumental soundtrack.
For a photo-and-video-reference performance, use the photo + video reference button above. For a longer visual story assembled around your uploaded song, use the separate song-to-MV guide linked below. This five-second test is not a Music Video Studio song-upload result.
- Character input: a synthetic adult character image, not a private user's photo.
- Motion input: the five-second party-entrance reference clip.
- Output: approximately 5.18 seconds, 1344 × 768 pixels; recorded output from the existing test.
What is reference-video animation?
Reference-video animation uses a clip to guide a new generated performance. You may also see this described as motion transfer or motion control. The words describe an intended workflow, not a guarantee that every tool copies motion in the same way.
A character image provides the appearance you want; the video provides a performance to follow. State explicitly whether the video should guide actions, framing, camera movement, or setting. Vismuse's example above uses both inputs to recreate a short party performance; it is not evidence of exact frame-by-frame motion transfer.
1. Choose a clear character image and reference clip
Use a clear character image with the face, hair, and clothing you want to retain. For a body performance, choose an image where the relevant body shape and outfit are visible. Avoid expecting the generator to invent details hidden by a tight crop.
Open the paired example to choose the provided party-entrance clip and upload your character image. The linked Burning Bridges workbench offers a reference-clip selector, not a file picker for uploading an arbitrary performance video. The five-second example does not establish supported lengths for every model or plan.
2. Say what comes from the image and what comes from the video
Separate appearance from performance in your brief. In this case, the character's curly hair and turquoise clothing come from the image, while the room, crowd, cup, gestures, and camera direction come from the reference video. The seaside background should not carry over.
Avoid adding several competing characters, locations, and action sequences to a short clip. Check the settings and credit quote shown by the chosen workflow before starting.
3. Compare the input and result before using the shot
Play both videos and compare the start, middle, and end. Inspect the lead's appearance, hand and cup interaction, movement, room, and camera framing. Keep useful shots and revise the brief when a required detail changes.
A reference can guide a performance without reproducing every gesture or camera position. Check faces, fingers, occlusions, and background people. Neither this example nor a good first frame guarantees perfect identity throughout the clip.
Can I upload my own reference video?
The linked Vismuse reference-performance workbench currently lets you upload the character image and choose from its provided video references. It does not offer an arbitrary video upload control. The recorded case uses the provided party-entrance clip.
If your project requires your own choreography or performance recording, check for a video-upload input before choosing a workflow. Music Video Studio is a separate song-and-image workflow; uploading an audio track there is not the same as uploading a motion reference.
Can I use this to make a full music video?
A short reference-guided performance can become one shot in a music video. It does not by itself turn an uploaded song into a complete MV. Generate and review the shots you need, then arrange them around music in an editor.
For Vismuse's separate song-upload workflow, use Music Video Studio and the song-to-MV guide linked below. It plans shots from your written brief and assembles completed footage with your selected audio. Do not assume an uploaded reference video in this workflow is also an input to Music Video Studio.
Will it copy the reference song or make my character sing?
Do not assume that movement guidance includes copying music or synchronizing a character's mouth to your lyrics. In the recorded example, the reference clip's original audio was removed and the test requested new instrumental music. Precise singing lip-sync was not tested.
For a release, use music and reference footage you have permission to use, and review the soundtrack in the exported file rather than inferring it from the video preview.
Workflow
- Choose the character appearance and a short performance reference.
- Describe which visual details and actions to follow.
- Check the workflow settings and quote, then generate.
- Compare both inputs with the output and review the sound before editing it into your MV.
Tips
- Keep appearance instructions separate from performance instructions.
- Review moving hands, props, and faces across the entire clip.
- Test one short performance before building a sequence.
Related resources
- Turn a finished song into an AI music video — The separate song-upload, storyboard, and assembly workflow.